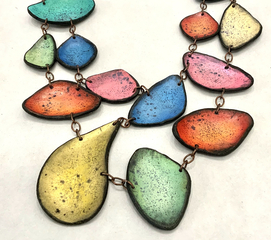
Faux Ceramic beads
Combining a variety of mixed mad to create a wonderful surface technique.
Tools and equipment
All the usual tools
- White and black Polymer clay
- Sponge
- A range of alcohol inks
- Gloves
- Alcohol ink pens Protip or Chameleon pens
- Balling tool
- Cutters or templates with the same shape and decreasing in size
- Small drill and drill bit
- Embossing powder black & clear
- 10x6mm oval jump rings
- Chain and clasp in the same colour
- Isopropyl Alcohol
- Mica powders to match your inks
Steps
Condition and roll the white out on the thickest setting 0 on the Atlas
Condition the black and toll out onto the setting 5 on the Atlas
Lay the black on to the white and pass through the pasta machine on a medium setting No 3 on the Atlas. 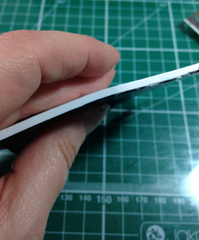
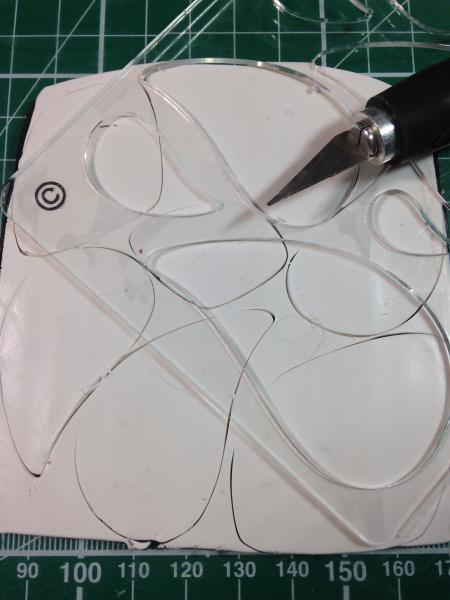
Cut out a series of shapes 10 -12 in a variety of sizes, fit the shapes to avoid wasting the clay.
Place the shapes on a clean tile.
Choose your colour of ink or blend the inks on your tile.
Use a sponge to apply the ink onto the clay, make sure your cover the white edges. 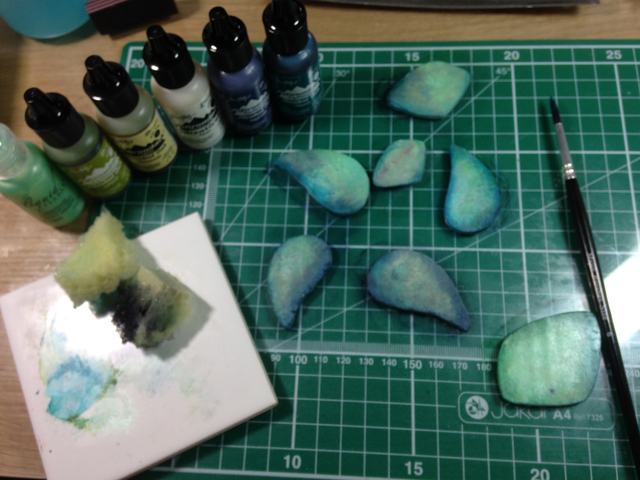
Blend or dilute the clay to get the depth of colour you want for the piece.
If you have alcohol ink pens use these around the edge of the piece and add dots for effect.
Experiment with the effects and colours until you are happy. Allow to dry
Repeat for each of the pieces, you can do each piece a different colour.
Lift the shapes out place them in the palm of your hand using the balling tool shape and drag the edges in so that the black show just around the outside of the shape.
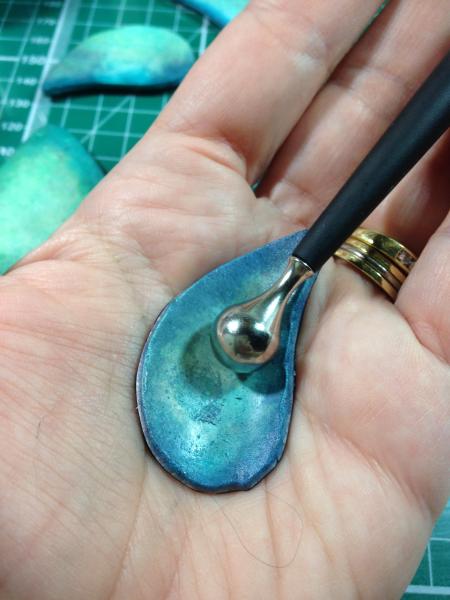
Rotate the balling tool over the surface to encourage the shape to curl up slightly.
If you choose you can add a fine layer of mica powder, choose an iridescent powder to add lustre.
Apply with your fingers in a rotating action to keep the edges curled up.
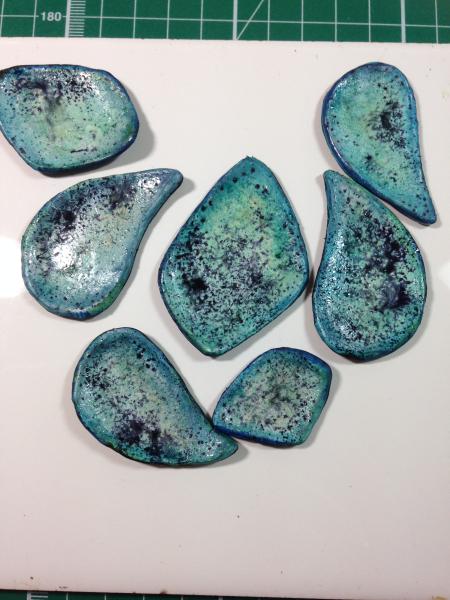
Place onto a paper covered tile. Sprinkle with a fine dusting of clear embossing powder.
To get the blackened look add a very tiny amount of black embossing powder, sprinkle it very sparingly
Cure for the correct length of time and temperature for your chosen clay.
Sand the back of each piece to remove any rough edges that may catch of your clothing.
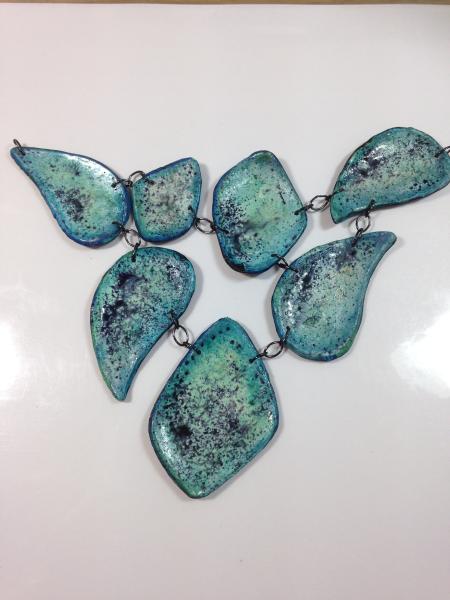
Juggle your cured pieces to see how they best fit together.
Photograph a couple of options before you decide how you want it to hang.
Make dots of your pieces where you want to put your drill holes, think about how the weight of each piece will hang before you drill the holes.
using a hand drill, make the holes and add an ov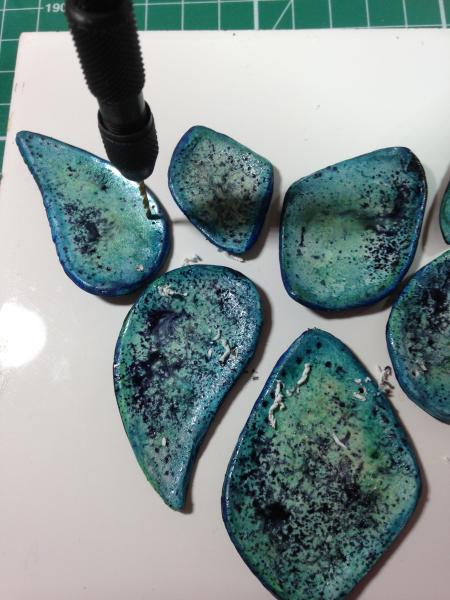 al jump ring into each hole.
Connect the two pieces with an additional jump ring.
Finish with a length of chain and add a clasp.
Check how the piece hangs and make any adjustments by adding extra holes and jump rings to connect your piece.
Alternative method used to get a stronger black edge
Skip adding the thin black layer of clay in steps 2 & 3
Repeat the steps through to curing
Then after curing coat the back of each piece with liquid clay, make sure you coat the edges too.
Add a thin sheet of textured black clay, wrapping it up around the edges of the bead. Trim the excess and check the edges have adhered to the front face of your bead,
this is what gives it the more dramatic look
Re-cure the clay for the length of time you brand of clay requires
Continue with the remaining steps to finish the necklace